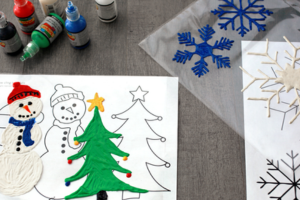
Gather your basics: white glue or clear glue, food coloring or acrylic paint, a handful of plastic sheet protectors or a piece of wax paper, and a set of paintbrushes or squeeze bottles. Black puffy paint works great for outlining your designs. Sketch your designs on plain paper first, then slip the paper under your plastic sheet as a guide so your shapes come out clean and symmetrical.
Begin by outlining your design with the puffy paint. This creates borders that hold the glue mixture in place. Let the outlines dry for about an hour so they do not smear when you add color. Once firm, mix your glue with a few drops of food coloring or acrylic paint to a smooth, slightly thick consistency; less color gives a stained-glass look, more color gives a bold, opaque cling.
Fill in each space with your colored glue mixture, working in small sections so it dries without thin spots. Gently pop any bubbles with a toothpick. Let your designs dry completely, usually about twenty four hours. You will know they are ready when the edges lift easily and the cling feels flexible but not sticky.
Carefully peel your window cling off the plastic sheet; it should come off in one smooth piece. Place the finished cling on a clean window or mirror, wiping it first with a damp cloth to help it adhere, then press from the center outward to smooth out bubbles.
Store them flat between sheets of wax paper when the season ends so you can use them again next year.